Guitar Building: Templates and Molds
One of the first steps in building a guitar is to build a mold, which the guitar will be built in. This is an important step in guitar building, and what I’ve read is:
If you can’t build the mold, you can’t build the guitar
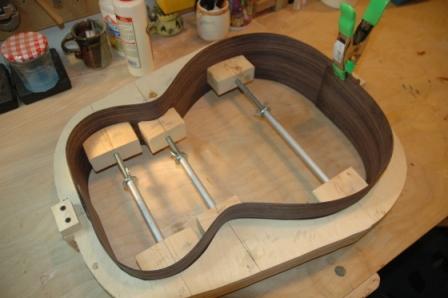
The mold helps set the bent sides, and provides a stable place to build the guitar. Here is an example of what I’m looking to build. In this example you can see that they have the sides of their guitar braced into the mold.
There are many ways to build this mold. I’ve settled on trying to build one out of layers of MDF, mostly because I can imagine building this with the tools I have. Before building a mold, however, one builds a master template, usually from some sort of plexiglass-like material. The template is the master shape of the guitar. But, unfortunately, before you can build a template, you need to decide what guitar you’re building. So, 1 – decide on guitar shape, 2 – make plexiglass template, 3 – build mold. So far this project feels like three steps backwards, one step forward.
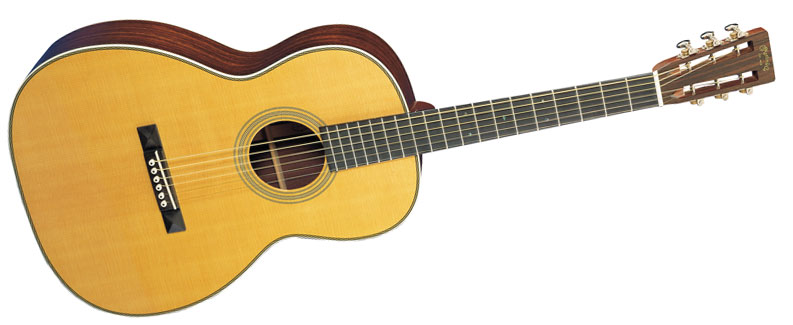
After much angst, I’ve settled on a design based on Martin’s classic 000-28VS, and I was able to get detailed plans for the 000-28VS from ultimate-guitar-plans.com.
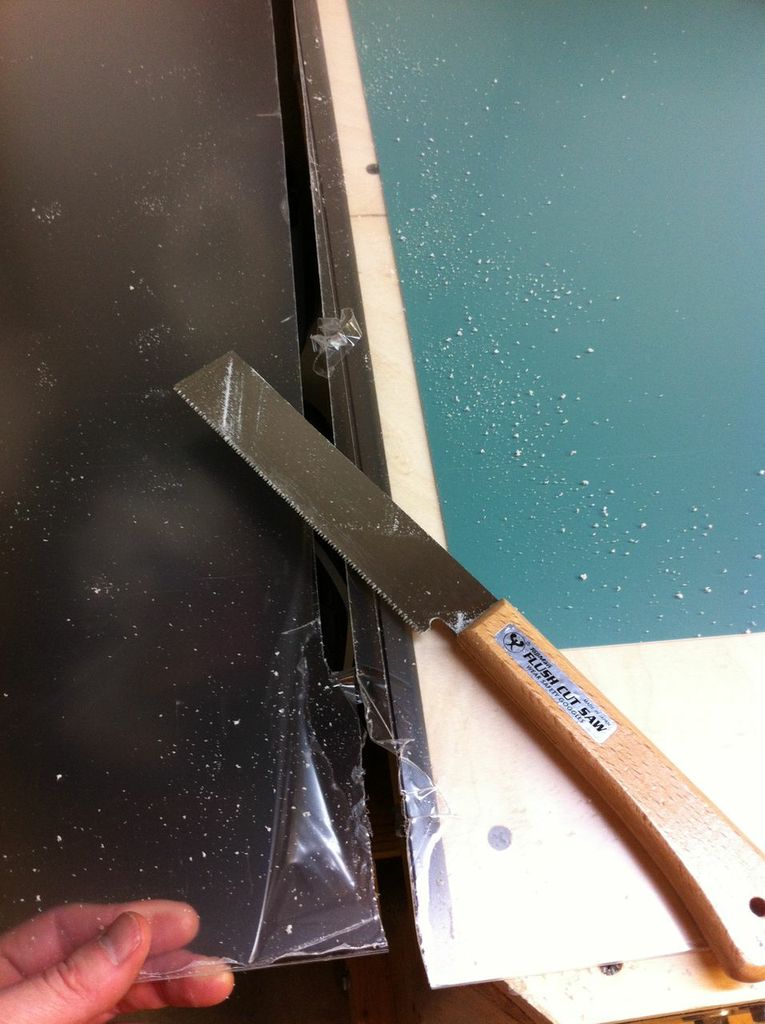
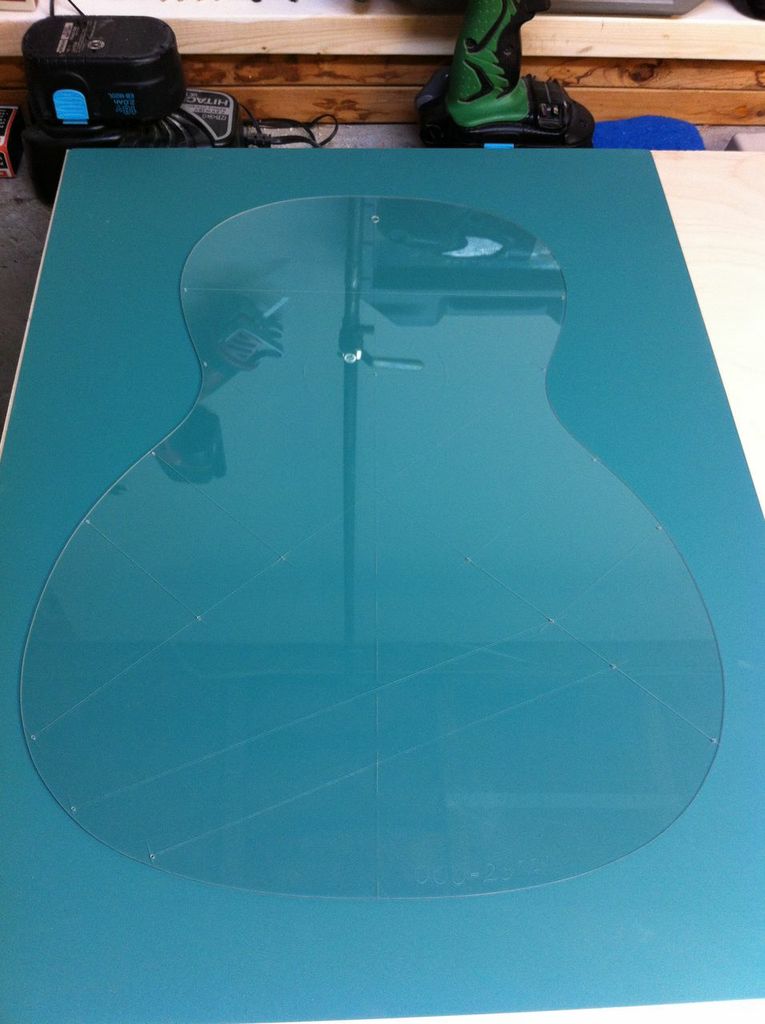
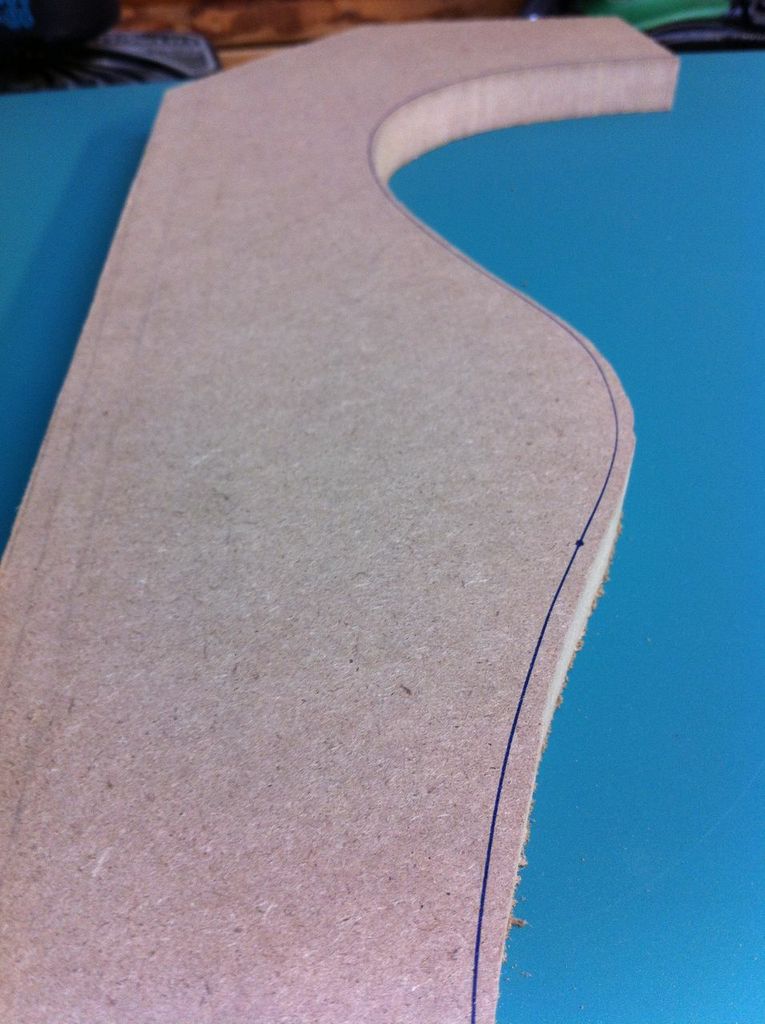
Once I had the plans, which are life size, I used an exacto knife to cut out the shape of the guitar from the paper plans. I picked up a piece of Lexan, which is sort of like plexiglass, but was a bit more flexible and thinner, at Home Depot. I bought a piece that was bigger than I needed, assuming I might have some false starts. The first step was cutting a piece off the sheet that I could work with. I was very excited, because this was the first real step towards the building of the guitar. Quickly, however, I ran into the challenge of making a clean cut through the Lexan. First I tried using a Japanese Hand Saw. This caused hairline cracks as I sawed. Damn. I switched to a jig saw. This mutilated the Lexan. Suck. I looked around the shop for other options, but none seemed like they would work. I thought of trying to use a rotozip, which may have worked, but I did not have a good bit. So, I decided to go back to the Japanese Hand saw and work slowly and gave myself room for error. Not great, but I was able to make an ugly, but acceptable cut. So much for building confidence.
Once I had the paper template and the Lexan cut, I affixed the paper template to the Lexan with spray adhesive, which also made the hair on my arms feel staticy/sticky. I’m never fond of having to use sprayable chemicals, but it did work great. Incidentally, the Lexan has a thin film of protective plastic on each side when you buy it. I left this on and stuck the paper template to this film.
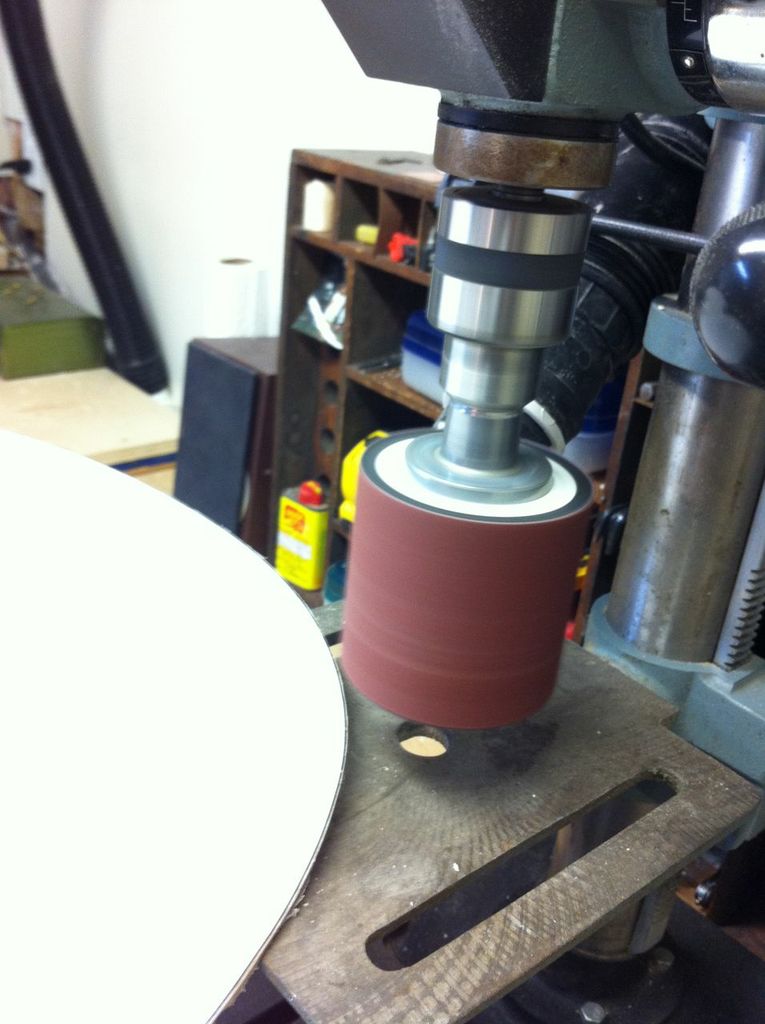
I then went over to the band saw to cut 1/4 inch to the edge of the paper. I have to say, after the trouble I had rough cutting the Lexan, I was fairly nervous about running the Lexan through the band saw. I tested with a small piece. To my surprise, it cut cleanly and without fracturing or splintering. Still, I was nervous. Once the entire shape was cut out, I needed to sand the final 1/4 inch down to the edge of the paper template. For this I used a drum sander attachment in my drill press. I bought the drum sander in a four pack from Harbor Freight tools for about $25. I actually tried to make one first, thinking I’d save about $24, but that attempt failed and I didn’t want to waste more time.
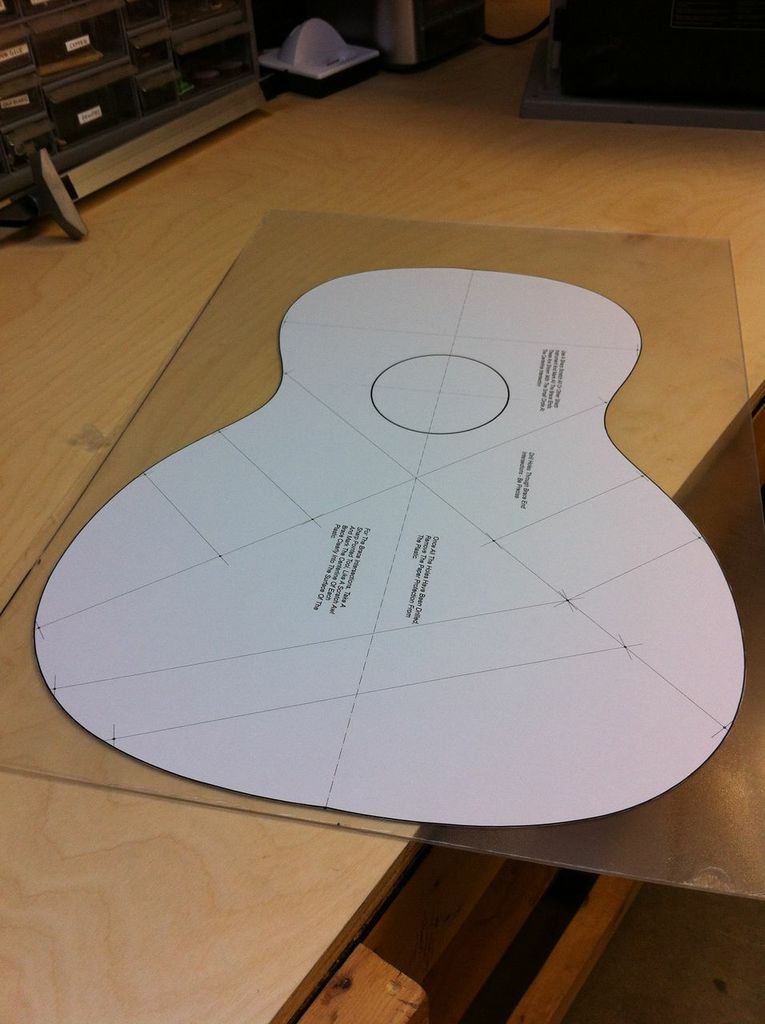
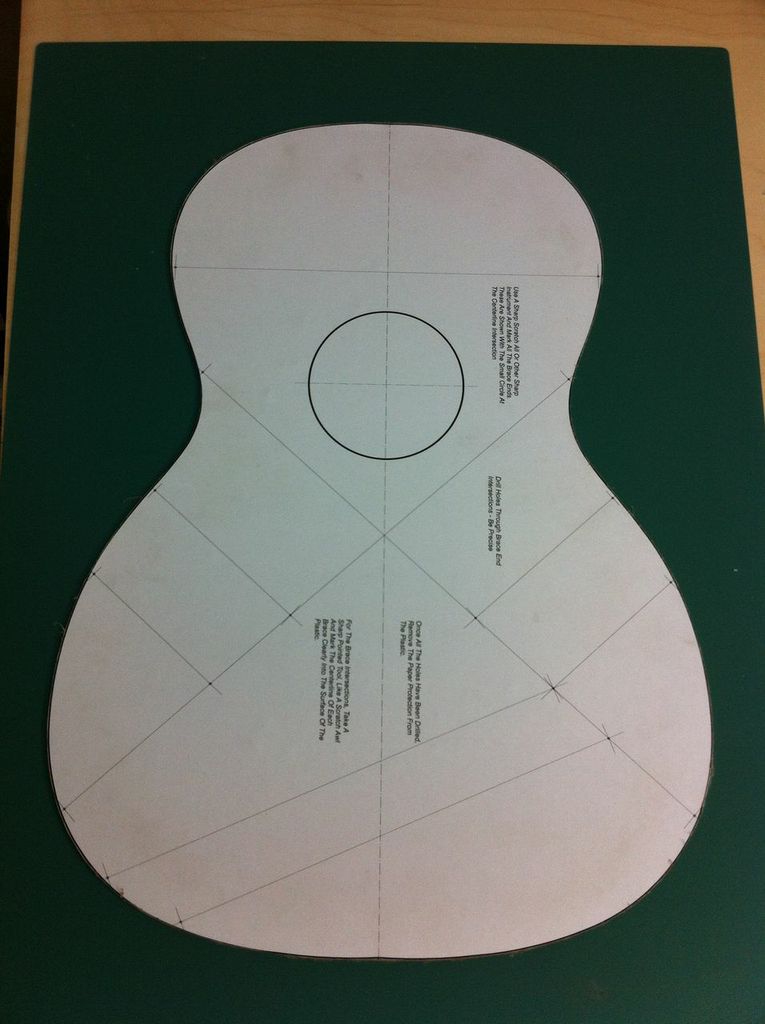
Here is the cut and sanded template.
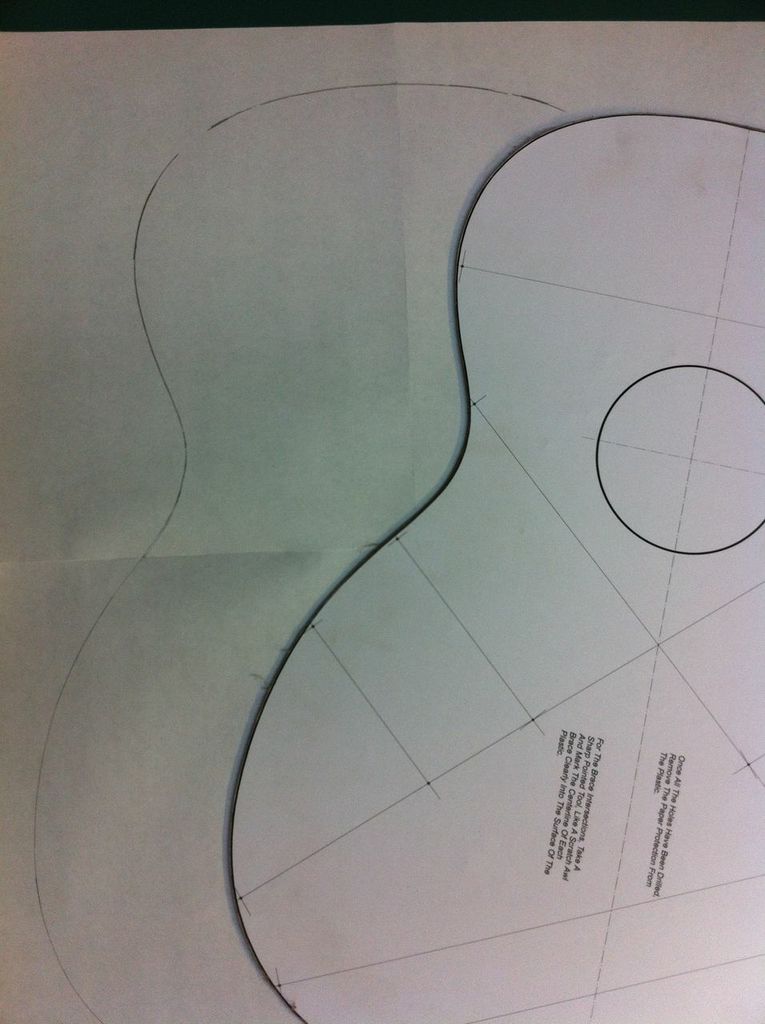
I then tested the template to see how accurate it looked. What I found was that it looked great, but when I flipped it over and retraced, there was error, which I expected. So, I’ve decided that I will only trace from one side, flip, trace the other side. This guarantees a perfectly symmetrical shape.
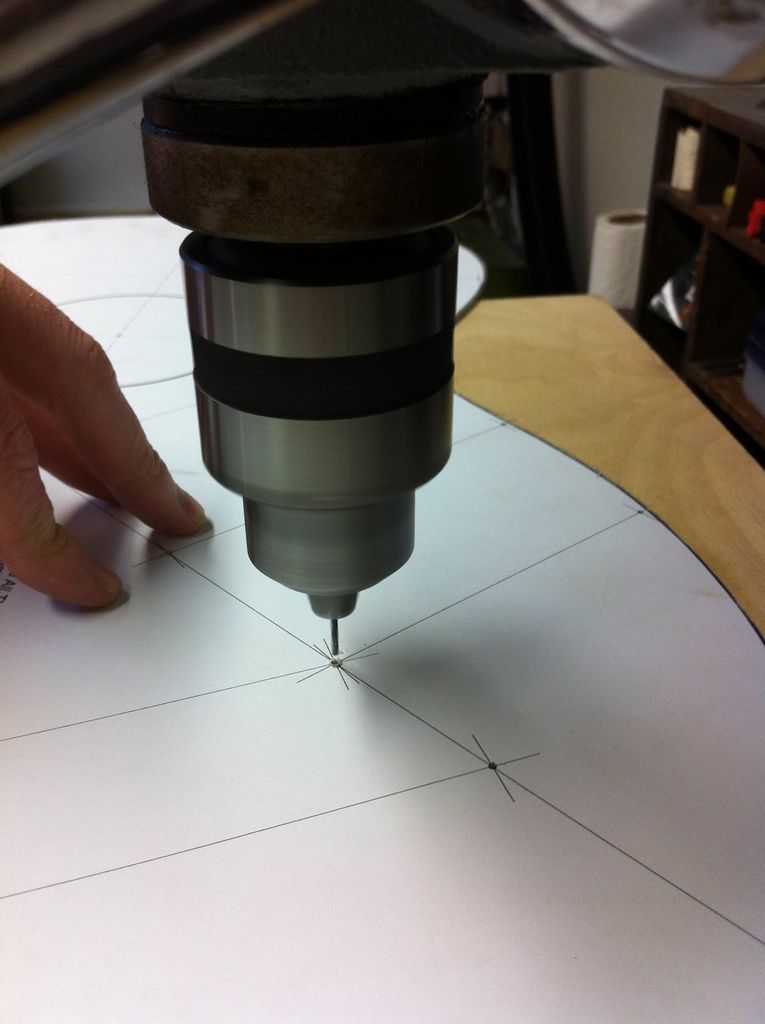
The lines on the template are where the bracing goes for the guitar top. Next step is to drill holes that mark the end of the braces. This will help when I need to layout the bracing. I also drilled a hole to mark the center of the sound hole.
Lastly, I used an exacto knife and scratched lines for the bracing and sound hole. I also labeled the template with ‘000-28VS’, though you can’t really see much of those details in this photo. Lastly, I lightly sanded the edges to remove sharp or rough spots.
I was able to get all of this work done in one evening, and I am really happy with how it turned out. I share my joy with the kids and wife. Tepid response. I sort of expected that. This master template is now used to make the guitar mold.
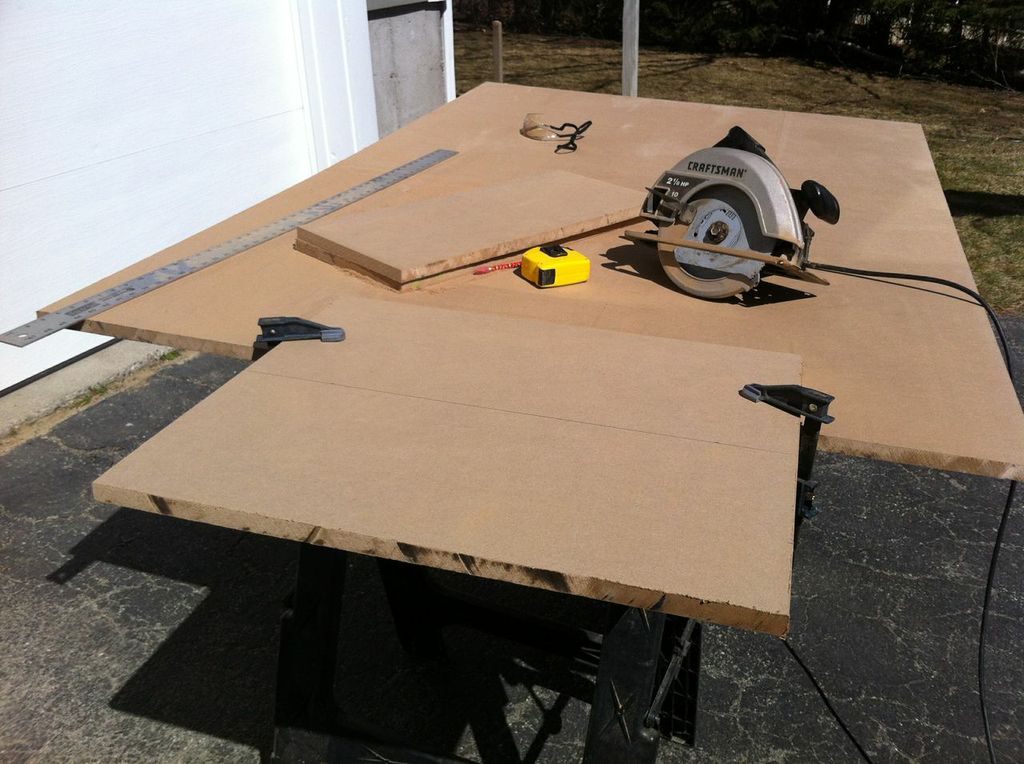
About a week later the winter weather broke and Saturday was a nice warm day. I used this as an opportunity to begin cutting up the 4×8 MDF I bought for the guitar mold. I cut pieces into 10 1/2 x 24 1/2 pieces with a skill saw.
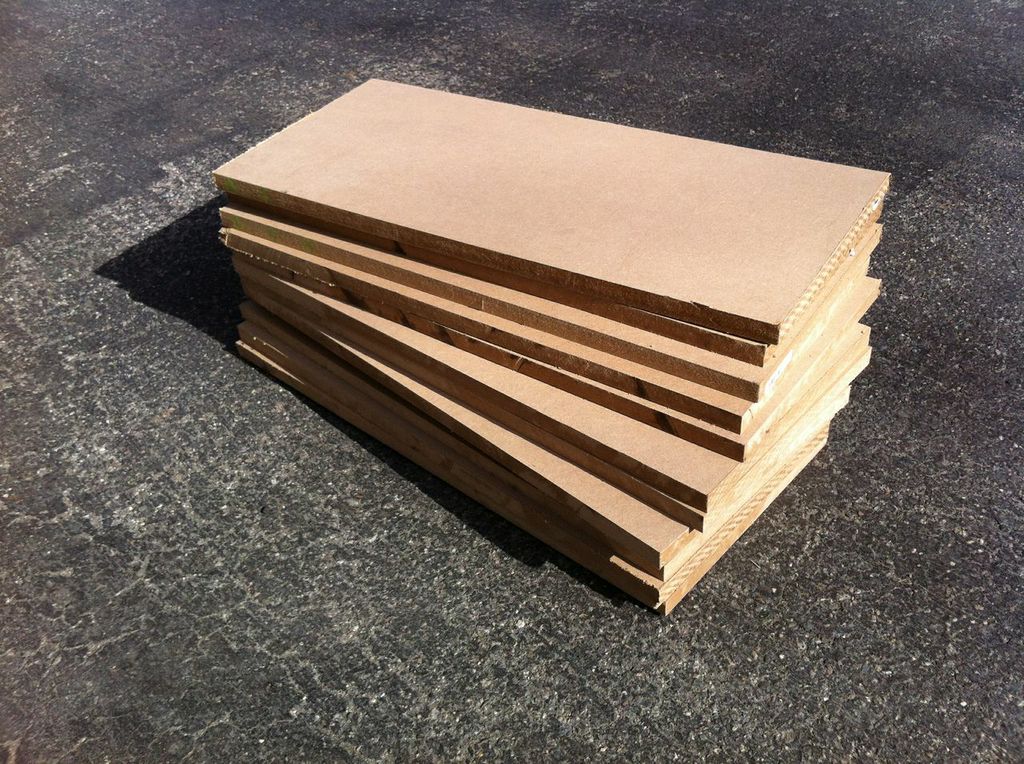
Here are the twelve pieces that I cut. I’d have to say that cutting this stuff was really dusty. I’m glad I did this outside, and I’m not looking forward to the sanding and routering of this material in the shop later.
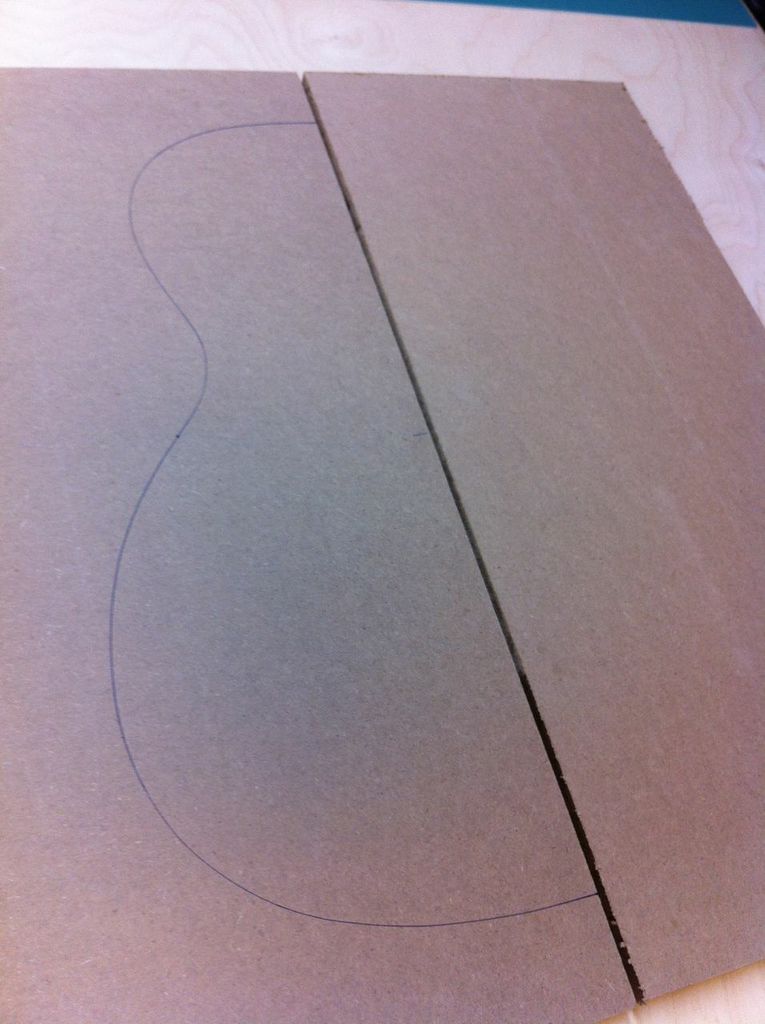
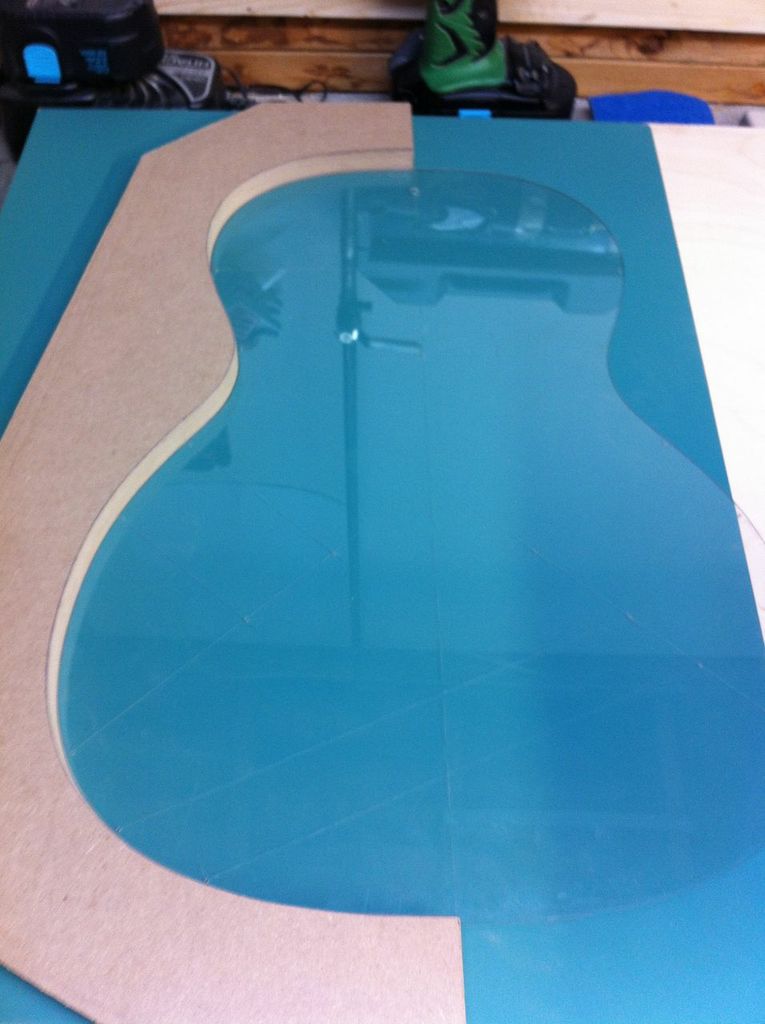
Ok, back in the shop, I trace half of the guitar shape onto a piece of MDF using my awesomely perfect Lexan template. I used a pen because I was afraid pencil would be harder to see when I was sanding.

Here it is. Looks good.
Next I cut to within 1/4 inch of the line on the band saw.

Here is the rough cut.
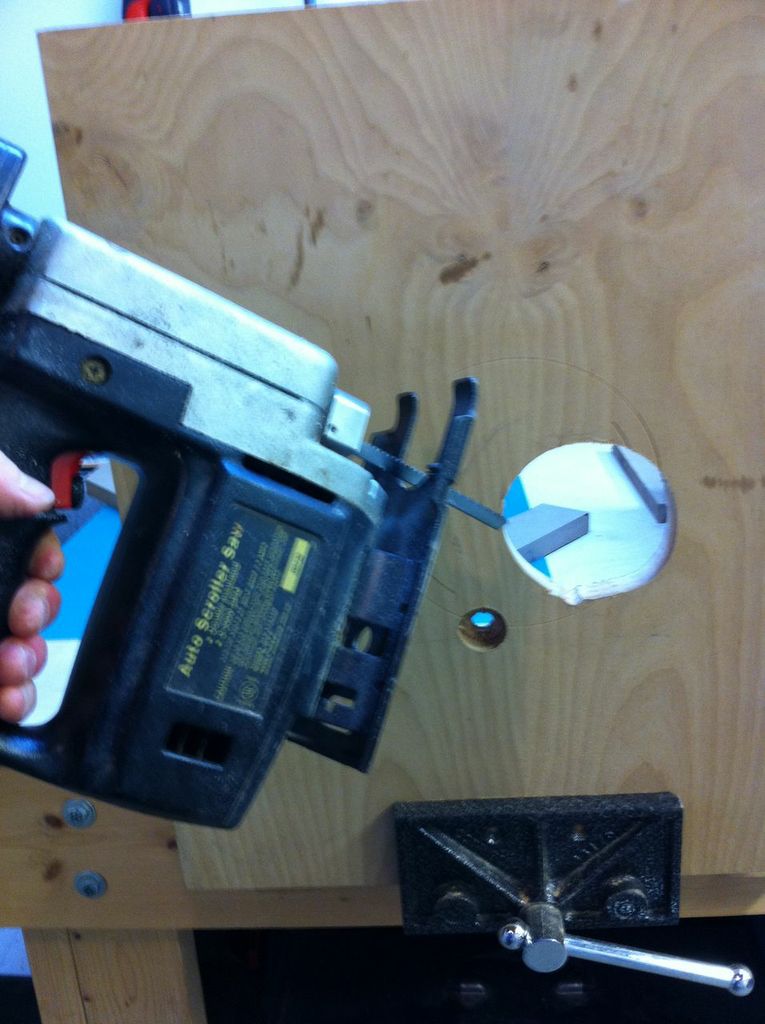
Ok, now I wanted to go back to the drum sander and sand down to the line. But first I needed to make a table for my drill press so that the drum sander could be ‘below grade’ so that I could sand the entire edge evenly. For this I used a scrap piece of plywood, and cut a hole with my jig saw that was slightly bigger in diameter than my drum sander.
With the plywood attached to my drill press table, and the drum sander set up so that it was slightly recessed into the table, I spent about a half hour sanding precisely to the line.
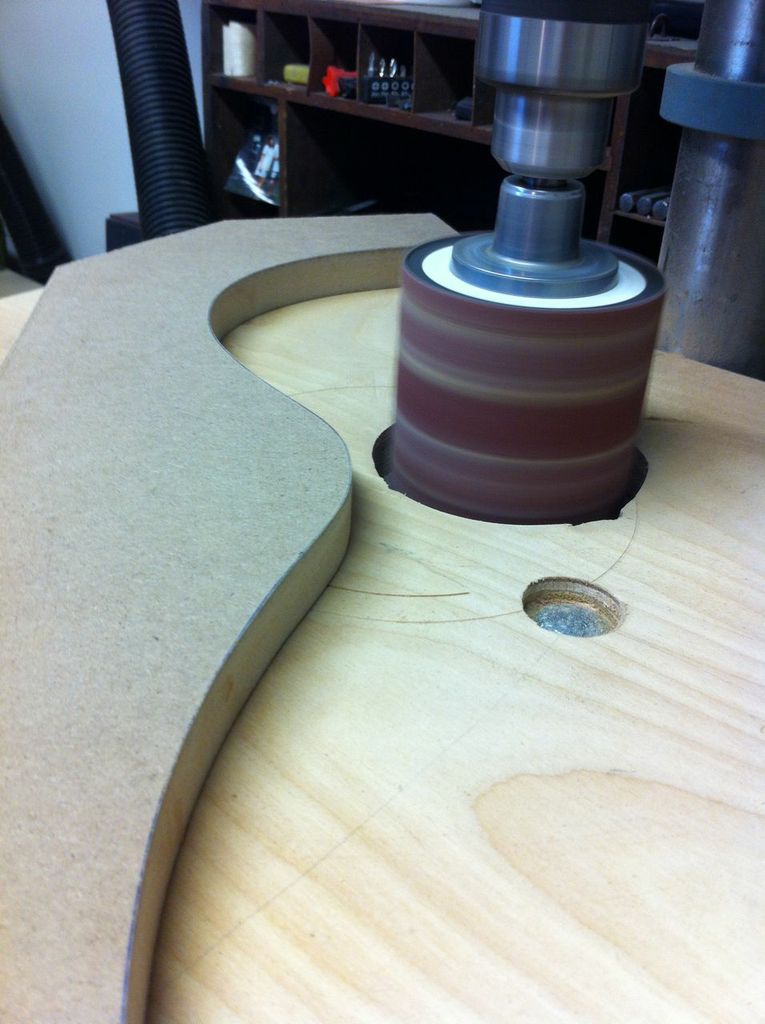
Once the sanding was complete, I tested it with the Lexan template. It fit perfect. Me happy. I then cut off some excess MDF to make it lighter. I suspect this will also make it easier to clamp guitar sides later.
Next I need to make eleven more that look exactly like this one, six for the left side, six for the right. For that I will be using this piece as the template and using a router, a tool I’ve never used, to shape the others. They will all be glued together, and when I’m done the mold will be about 4 1/2 thick. Stay tuned.
1 COMMENT
Great tips, Thanks